Update October 15, 2014: This post is based on SPCAF version 4.*, and is updated to include the TFS Build Activity changes in SPCAF version 4.5.2.
If you are looking how to run SPCAF v5 during TeamBuild in TFS 2013, see this post.
This how-to is based on the SPCAF how-to written for TFS 2012.
SharePoint code analysis with SPCAF can also be executed during a TFS Team Build. This helps to ensure the correctness of the SharePoint code. During the Team Build all found errors and warnings are listed in the build result. Additionally the SPCAF reports can be generated and saved to the output directory.
SPCAF supports the Team Build with the following products:
- TFS 2010
- TFS 2012
- TFS 2013 (with this how-to)
- Team Foundation services (TFS Online)
To support TFS 2010 and TFS 2012 SPCAF comes with 2 different build activities which can be integrated into the workflow of a Team Build, depending on the version of TFS. The build activities can be found within the installation directory of SPFAC in subfolder “TeamBuildActivities”.
- SPCAF.BuildActivity.TFS2010.dll
- SPCAF.BuildActivity.TFS2012.dll (also used for TFS 2013)
Note: The build activities should not be copied directly into the installation folder of SPCAF because SPCAF searches during analysis within the installation folder for custom rules. As the activities depend on Team Build assemblies they cannot be loaded and SPCAF cannot execute.
Note: If you are not familiar with configuration of team builds in TFS please request somebody to help you.
The following steps provide the general instructions for the Team Build. Some standard TFS configuration steps are skipped.
Preparation
To run SPCAF on the build server the SPCAF assemblies must be available on the build server. You don’t need to install SPCAF on the server!
-
Open Source Control of TFS and navigate to folder “BuildProcessTemplates” of your team project It is possible that this folder does not exist in your TFS 2013 team project. You can create it manually.
-
Create a subfolder “CustomAssemblies” and check in
-
Within this folder create a subfolder “SPCAF”
-
Copy only the following assemblies from SPCAF installation directory to that folder:
- ICSharpCode.Decompiler.dll
- ICSharpCode.NRefactory.CSharp.dll
- ICSharpCode.NRefactory.dll
- Jurassic.dll
- log4net.dll
- Microsoft.Deployment.Compression.Cab.dll
- Microsoft.Deployment.Compression.dll
- Mono.Cecil.dll
- Mono.Cecil.Pdb.dll
- Mono.Cecil.Rocks.dll
- Spark.dll
- SPCAF.Dependencies.dll
- SPCAF.Engine.dll
- SPCAF.Inventory.dll
- SPCAF.Metrics.dll
- SPCAF.Rules.dll
- SPCAF.Integration.CSSLint.dll
- SPCAF.Integration.CSSLintRunner.exe
- SPCAF.Integration.JSHint.dll
- SPCAF.Integration.JSHintRunner.exe
- SPCAF.Sdk.dll
- SPCAF.Sdk.XmlSerializers.dll
- log4net.config
Do not deploy the assemblies
- Autofac.Portable.dll
- De.TorstenMandelkow.MetroChart.dll
- SPCAF.Client.Core.PortableInfrastructure
- SPCAF.VSPackage
- SPCAF.VSPackage.Common
-
Also include the License.lic file with your license (can be found in users AppData directory)
-
Copy the assembly from folder “TeamBuildActivites” in the SPCAF installation directory to that folder in TFS
-
Copy the folder “RuleSets” to the folder in TFS
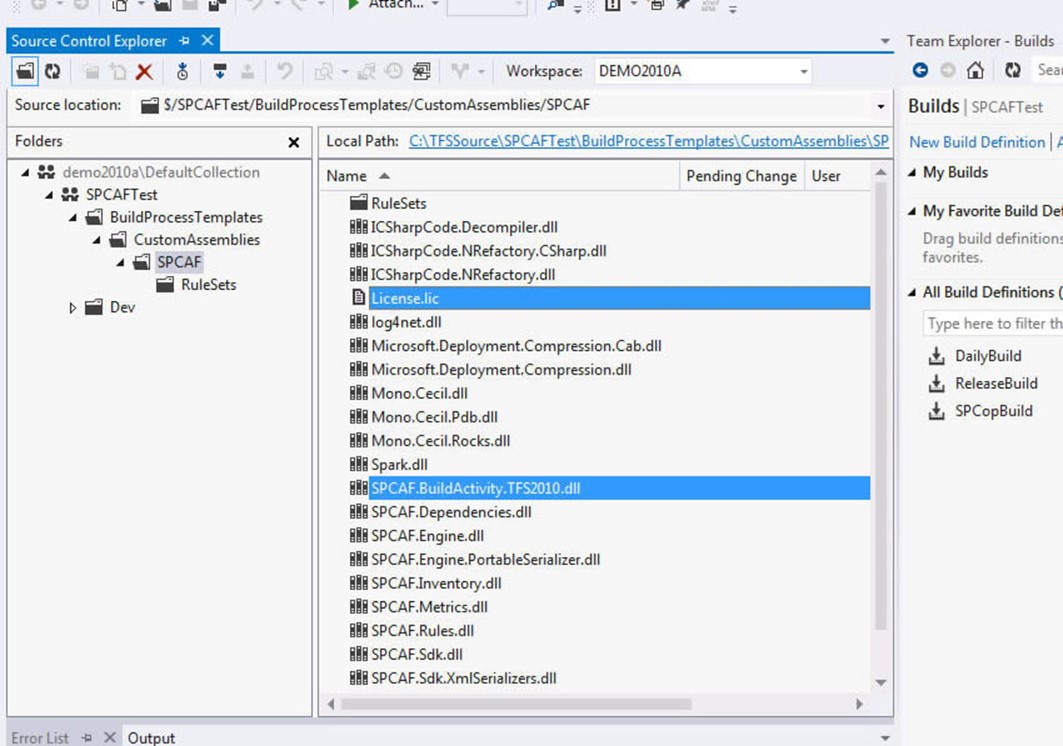
You should end up as shown in the following screenshot:
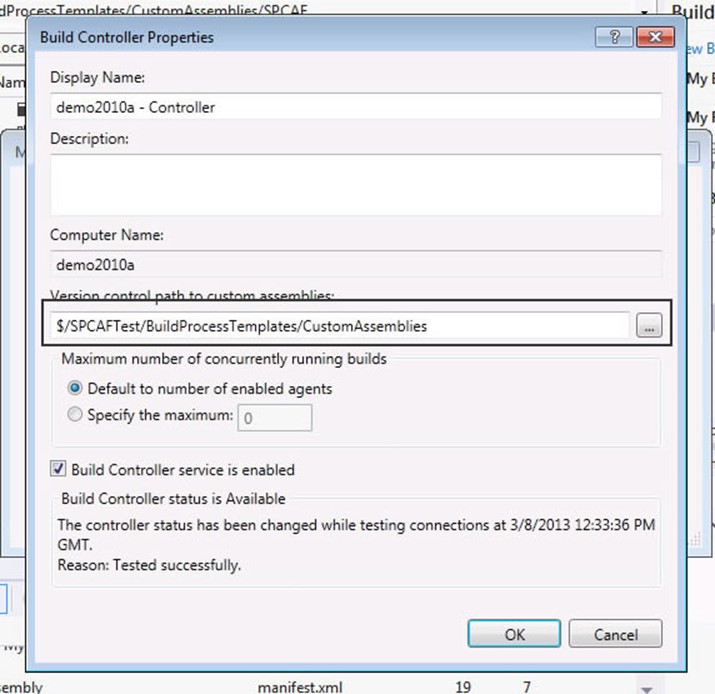
Configure Build Controller to load the SPCAF Assemblies
Now we need to tell the Build Controller that during a build the SPCAF assemblies should be loaded.
Add SPCAF Build Activity to the Process Template
It is possible to manually edit the process template with a text editor. In this how-to you are going to use the designer in Visual Studio.
Add Build Activity with Designer in Visual Studio
If you don’t want to add the build activity to the process template in XML you can use a visual designer in Visual Studio.
-
Make a copy of an existing Process Template e.g. DefaultTemplate.xaml in TFS an name it for instance DefaultTemplateSPCAF.xaml
-
Create a new project of type Class library in Visual Studio and delete the default created Class.cs
-
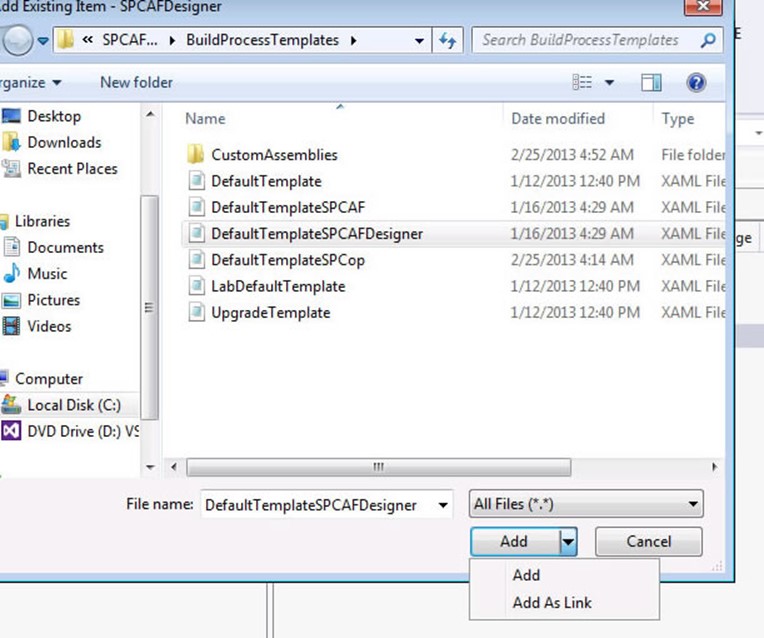
Add the copied Process template ‘DefaultTemplateSPCAF.xaml’ to the project via “Add Existing Item” and navigate to the folder with DefaultTemplateSPCAF.xaml. Important: Select “Add As Link” in the dialog to add only a link to the file.
-
Add the necessary reference to the project:
- Microsoft.TeamFoundation.Build.Workflow.dll
- Microsoft.TeamFoundation.VersionControl.Client.dll
- Microsoft.TeamFoundation.VersionControl.Common.dll
-
Add reference to SPCAF.BuildActivity.TFS2012 to the project from the previously created folder “CustomAssemblies”
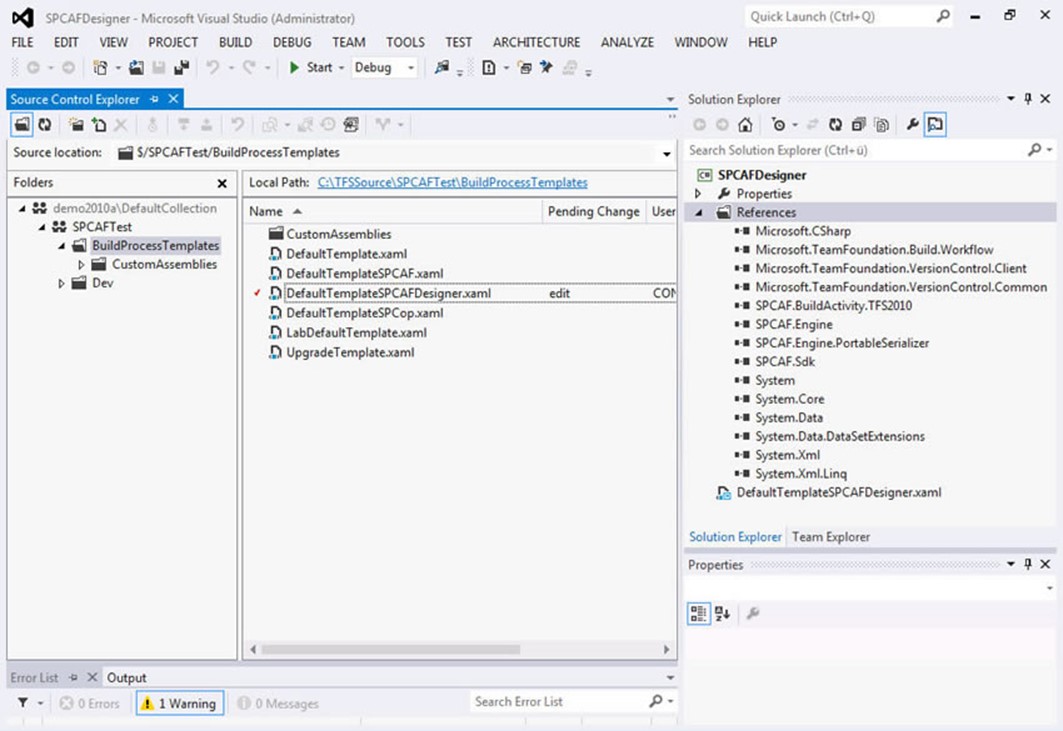
See below the Visual Studio project with all references, the linked DefaultTemplateSPCAF.xaml
-
Open the process template in designer.
-
Add the SPCAF build activity to the toolbox: Right click in toolbox and select “Choose items…”. In tab System.Activites Components select “Browse…” and select the assembly SPCAF.BuildActivity.TFS2012 from the folder “CustomAssemblies”. The Build Activity appear in the toolbox.
-
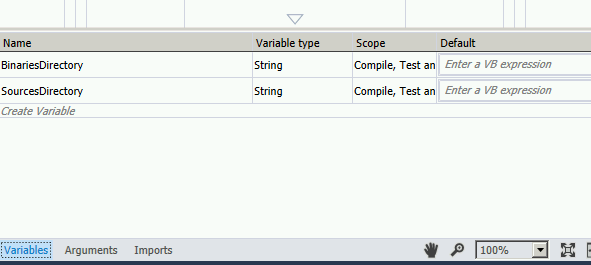
Because in TFS 2013 the default build process template is a little bit different we need to add a variable to store the path to the Binaries Directory. Open the tab “Variables”, add a variable named “BinariesDirectory” with the type “String”, you can leave the scope in its default setting.
-
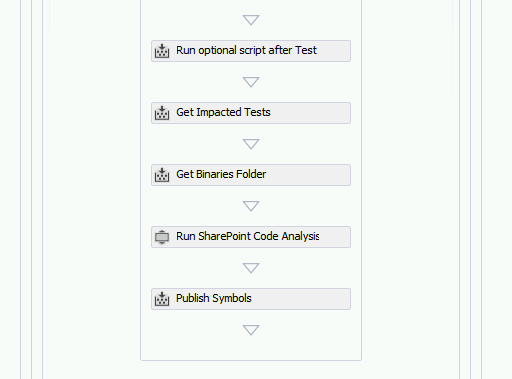
In the process template navigate to Compile, Test and Publish and open the try block. Drag a GetEnvironmentVariable activity below the “Get Impacted Tests”-activity. Set the activity arguments according to the table below:
Argument Value Name Microsoft.TeamFoundation.Build.Activities.Extensions.WellKnownEnvironmentVariables.BinariesDirectory DisplayName Get Binaries Folder Result BinariesDirectory -
Drag the SPCAF build activity below the Get Binaries Folder activity.
You should end up with the following setup:
-
Configure the SPCAF build activity to your needs (see parameters below).
-
Save the process template and check in.
Parameters of Build Activity
The following parameters can be configured for the build activity.
| Argument | Description | Sample Value |
|---|---|---|
| DisplayName | Required String. Title of activity, used in logfiles. | “Run SharePoint Code Analysis SPCAF” |
| SettingsFile | Optional String. Name of settings file in folder “/RuleSets” or full path to a different ruleset file. | |
| TempFolder | Optional String. Path to temp folder. If not set SPCAF uses a standard temp folder. | |
| FailBuildOnError | Optional Boolean. Default FALSE. If TRUE the build fails if SPCAF detects errors. | FALSE |
| IgnoreExceptions | Optional Boolean. Default TRUE. TRUE to ignore exceptions during analysis. Settings this value helps to ensure that the build finishes successfully also in case of exceptions. | TRUE |
| InputDirectory | Required String. Path to WSP solutions. Can be a folder name or a list of files (separated by ‘;’). | BinariesDirectory |
| LogExceptionStack | Optional Boolean. Default FALSE. In case of problems with SPCAF setting this value to TRUE adds more information to the logfile which describes the error in detail. | FALSE |
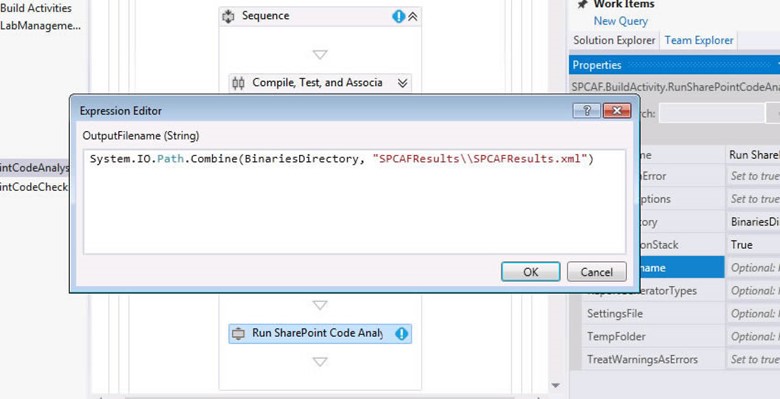
| OutputFilename | Optional String. Defines the ouptput filename of the reports. Typically the output folder should be in the BinariesDirectory. After successful build the whole BinariesDirectory is copied to the DropLocation. Alternatively the DropLocation or any other folder can be used to save the results. | System.IO.Path.Combine(BinariesDirectory, “SPCAFResults\SPCAFResults.xml”) |
| LogFile | Optional String. Defines the path to the log file. | System.IO.Path.Combine(BinariesDirectory, “SPCAFResults\spcaf.log”) |
| ReportGeneratorTypes | Optional String. Defines which reports should be created | “HTML;XML;DGML;DOCX” (DOCX is supported since version 4.5.2) |
| TreatWarningsAsErrors | Optional Boolean. Default FALSE. If TRUE all warnings will be evaluated as errors. | FALSE |
| ThrowExceptionOnError | Optional Boolean. Default FALSE. If TRUE an exception will be throw in case of critical errors or errors. | FALSE (Available since version 4.5.2) |
| Verbosity | Optional String. Detail level of output (e.g. minimal, default: normal). | normal |
The build activity returns the following values after analysis. (Supported since version 4.5.2)
| Argument | Description |
|---|---|
| CriticalErrors | Integer. Contains the number of critical errors after analysis. |
| Errors | Integer. Contains the number of errors after analysis. |
| CriticalWarnings | Integer. Contains the number of critical warnings after analysis. |
| Warnings | Integer. Contains the number of warnings after analysis. |
| Information | Integer. Contains the number of information after analysis. |
Create a new Build Definition
Now we can use the new process template in a new Build Definiiton
-
Create a new Build Definition in TFS
-
In the build definition goto tab “Process” and select “New..” and “Select an existing XAML file” and choose the DefaultTemplateSPCAF.xaml
-
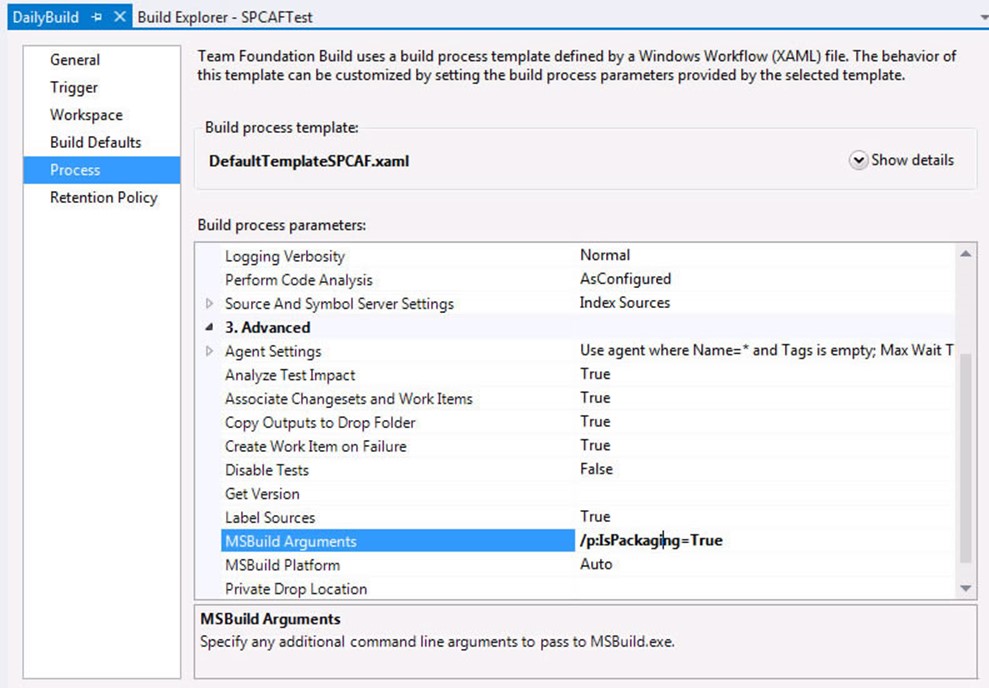
For building SharePoint projects a special setting is needed: Go in process tab to “3. Advanced” and change the parameter “MSBuild Arguments” to “/p:IsPackaging=true”. This ensure that during the build process the WSP files are created.
-
Run a build with the new Build Definition. To check if SPCAF was configured correctly check the log. There you can find the output of the analysis.

-
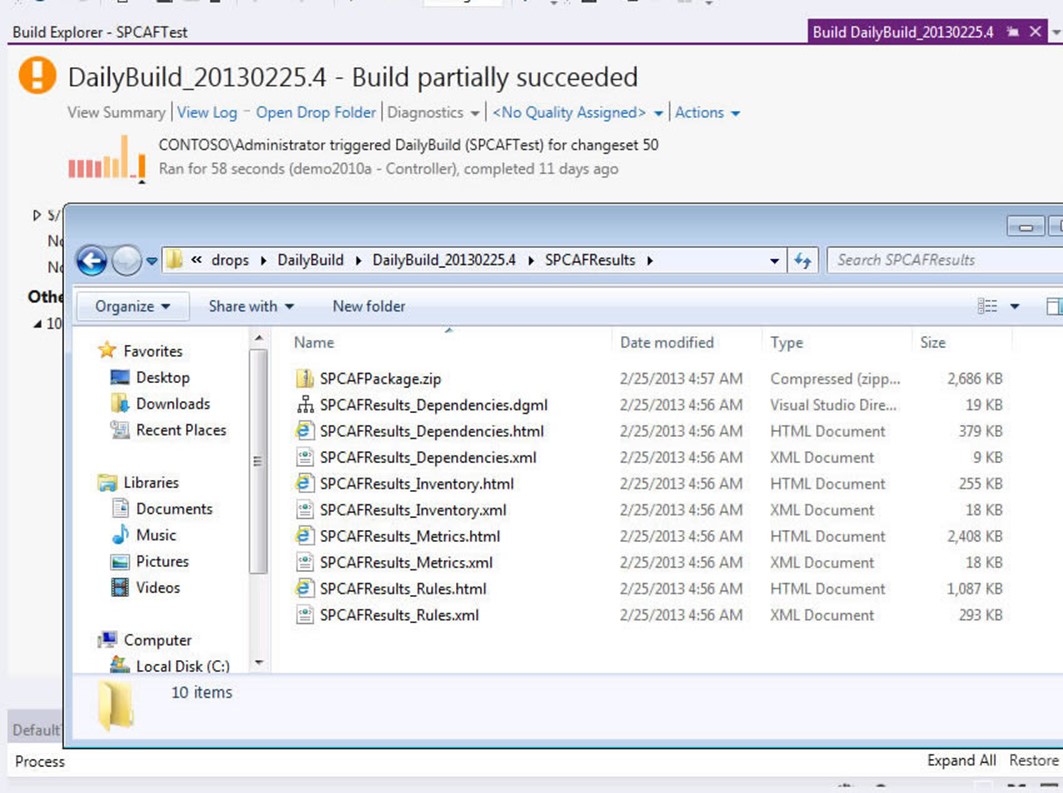
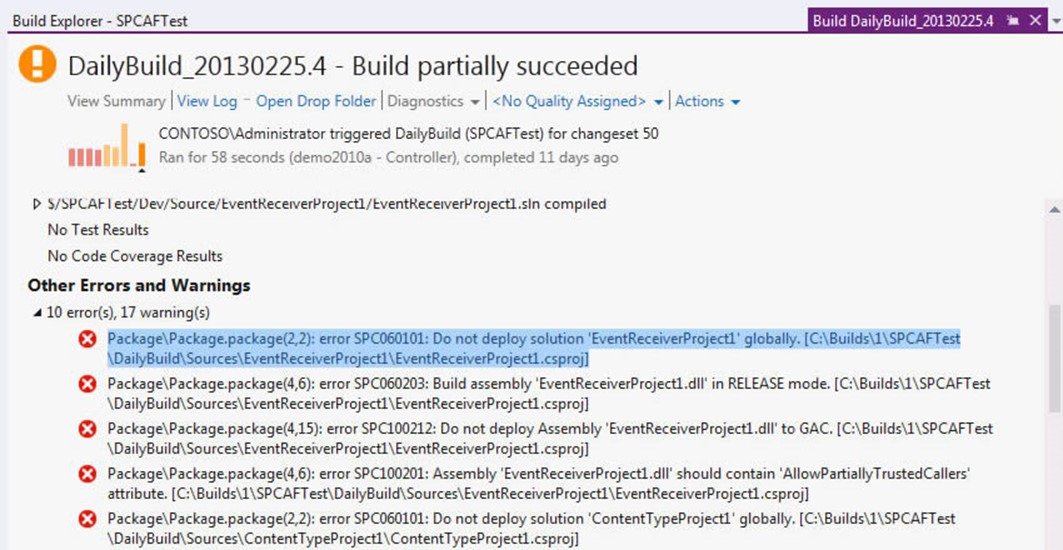
In case of found errors and warnings during analysis the result can be found in the Build Summary.
-
Navigate to the DropLocation. There you should find the created SPCAF reports.